I don’t know anyone who hasn’t seen a round-up post from Buzzfeed titled something like “28 Ways to Fix Stuff Your Kids Ruined” or “27 Household Cleaning Tricks Every Parent Should Know.” Buzzfeed is well known for their epic lists for all sorts of random things from entertainment and celebrities to parenting and homemaking to general life hacks. All of these list posts have something in common – they are a collection of images, memes, gifs, or pictures from other people, places, and the web. They are what many bloggers refer to as a round-up post. Round-up posts feature work from many different sources all on one single subject that are put it together in a visual or list way that is easy for readers to consume. And as consumers it seems we can never get enough of them as they tend to be very popular posts for small and large websites and blogs alike!
Some of my most popular content are round-up posts and for many other bloggers too. People love being able to scroll through just one post looking for inspiration, a laugh, or that perfect helpful tip. The great thing about round-up posts is that they are often shared too. There is a science behind why people share things, and one of the reasons people share things is to look smart or be helpful. A collection of posts or images all on one topic, full of great pictures or information, is begging to be pinned, liked, stumbled, tweeted, or otherwise shared. This means the post can keep receiving traffic again and again. This is great for the person hosting the round-up and great for those who are featured in it.
So I want to share with you the ins and outs of both being on a round-up and putting together your own round-up for your blog or website so you can drive traffic to your blog.
How to be featured in Round-up Posts
It should go without saying that you need to have awesome, shareable content with great images if you want to be featured in a round-up post by someone. While less-than-stellar photography or posts can still be found in round-ups, the best round-ups have stunning pictures (think of those Home Decor round-ups or recipe round-ups) that take you to great content. So, make sure you are creating great stuff!
Sometimes you will randomly luck into being featured in a round-up, like if Buzzfeed likes and uses one of your posts. Those first two BuzzFeed articles I linked to at the start of this post actually feature some cleaning hacks from my own blog, What’s up Fagans?. It was a nice surprise to wake up one morning and see a trackback from BuzzFeed and to see some traffic coming my way from them.
But, most of the time you won’t just be featured, or at least very infrequently. If you are looking for a great way to drive more traffic to your blog, sometimes indefinitely, than you really need to look for ways to be featured in Round-up posts.
The best and easiest way that I have found to be featured in a round-up post is through Facebook groups. I am a member of three Facebook round-up groups: Operation Round-Up, Bloggers Sharing Links for Roundups, and KBN Content and Round-Up Requests. The last group is unfortunately limited to members of the Kid Blogger Network, so you have to join that first before joining their round-up group. Their content focuses mainly on kid activities, family, parenting, and all things kid-related. The first two groups are often chocked full of requests for recipes and DIY requests. But, you will find requests for many different genres in these groups as well, just not as often.
Several of these Facebook groups even have their own search engines for all the bloggers that have agreed to let people use them in round-ups. In fact, you can join a search engine of “Roundup Friendly Blogs” on this form. Basically, it’s an agreement that you sign that says you own the work on your blog and you agree to allow others to use those posts in a roundup (one photo with a link back, or just a title with a link back) and that if you create a roundup you agree to only use one photo and always link back properly. Once the agreement is signed you get the url of the search engine and can then can add your blog so others can find your post.
Proper Etiquette for Leaving Links and Being Featured in Round-Ups
The Facebook groups are set up in such a way it is pretty easy to scroll through and find applicable (to your site) threads to comment and leave links for. Personally, I find it it best to share a link with a brief text intro like “3-Ingredient Cheese Ball” and then the link. It helps the rounder-upper more easily find exactly what they are looking for. I also think it’s best to delete the preview, but some actually prefer it there, and some can’t remove previews from their mobile devices. When you share links, please be mindful of the poster’s due dates. I find it is best to check into these groups 1-2 times a week to see if there are any threads that fit your content so you don’t miss out.
Soon you are likely to see your content featured on various websites!
What to Do When You are Featured in a Round-up
When you get those trackbacks to your content, I find it is courteous to visit their post, leave a comment thanking them for sharing your content, and then sharing their post on your social media networks. I usually use ViralTag (my affiliate link – You’ll get a $15 credit if you sign up with it) to schedule several shares of their post to my boards and group boards I belong to. Since Pinterest is my best social media platform with the largest potential audience, that is where I like to share content the most. In fact, I even created a “I’ve been featured” board on Pinterest where I always pin posts that I have been featured in as well as my guest posts and contributor posts. If I am running low on other people’s content to pin, I can always grab some of those pins and share again.
Another great place to share their content is on StumbleUpon which generally loves round-up posts.
Sharing round-ups you are featured in helps the poster gain more traffic, which helps you gain more traffic. And if a post goes viral on Pinterest or StumbleUpon, you are likely to continue to see hits to your site coming in over the next weeks, months, and even years.
How to Put Together Killer Round-Ups for Your Blog
While being featured is awesome, especially as a newer or smaller blog by a bigger and better site, it’s also great to be the one who makes that killer round-up that goes viral and gets fantastic traffic for a very long time. Primary traffic is always better than secondary. And I’m going to share tips on making sure your round-up does well and brings you as much traffic as possible.
Choosing a Great Topic
Not all round-ups are going to be smashing successes, often simply because the content or topic just isn’t as share-worthy. So, it is important to pick round-up topics carefully. It seems that many people have the best luck with very specific, niche, topics as opposed to more broad topics. For instance, a round-up of “50+ Dinner Ideas” might not do as well as “50+ Dinner Ideas that are Ready in 30 Minutes or Less.” This may not always be the case, but segmenting a round-up into more specific categories also can allow you to do multiple round-ups (or more blog posts, which means more potential traffic) on the same topic (Dinner Ideas). I also think making them more specific and helpful makes them stand out from the countless generic round-ups that are out there.
I also suggest thinking about your own content! What topics do you most often write about? Do you have several on the same or very similar topic? One of the smartest ways to do a round-up is to include several of your own posts in the round-up! It means even more pageviews and traffic for your site. Some people even do round-ups solely of their own content. It can be a great way to remind people of old content on a given topic.
Also, round-up posts can be a great way to feature your affiliates! I wrote a post about Freebies, Discounts, and Deals for Pregnant Women, New Moms, and Babies which is a collection (round-up) of several different products that I am an affiliate for. It often receives search traffic and income for me. So, don’t forget to look at your affiliates (or pick up a few new ones) and think about how to include them into a collection post.
Collecting Links – Proper Etiquette
When you are putting together a round-up, you can often ask in Facebook blogging groups you belong to for links. Refer to the Facebook groups that I mentioned above under “How to be featured in a Round-up Post”.
When you are starting a thread for a round-up request, it is often best to start with “ISO: Blog Post Round-up Topic” and then give any specifics as to what you are looking for (or not looking for) if needed for clarification, share what blog the round-up will show up on (as many VA’s use these groups for the bloggers they work for, or some sell them to other websites). Lastly, include an end date. Several of these round-up groups prefer to keep their groups clean, and will go through and delete old threads. While deadlines can move as needed, it’s helpful to give people several days (a week is pretty common) so that people who don’t check in every day can still submit their links.
However, sometimes, you may find that people do not have a lot of links on your topic, or the content isn’t quite what you are looking for, or the pictures or post aren’t so stellar. If this is the case, I often I go searching on my own for links. I have searched for great posts on my topic on Pinterest and even on Google. It is generally best to ask permission from the blog owners if it is okay to link to their site and use an image. However, I rarely, if ever, do. So far I have never had someone complain about me sending them traffic with proper credit and use of their pictures in a round-up. If it does happen, I would be more than willing to remove their site from my round-up. My point is, you don’t have to feel limited to blogging groups! The world wide web is full of millions of ideas just waiting to get shared!
Collect all the links, go through them, and narrow it down to the very best. One of my friends, Heidi of OneCreativeMommy.com, pins all the links to a secret group board on Pinterest. This allows her to look at all of them at once when she’s ready to pick her favorites. With a secret board, all the images she needs, post titles, and links are all neatly kept. When she’s done making the round-up post she then schedules those pins to her regular boards.
Round-ups usually consist of 5 or more links. There is a science behind the best numbers to choose, but really, it doesn’t matter too much. You don’t have to use the exact number in the title or Pin image. Sometimes people use something like 50+ as well, in part because they can then add or delete as needed later. Generally, I don’t see round-ups of items that are much bigger than 50 and some people have better luck with long lists and others with small. Sometimes it just comes down to luck!
Organizing Your Post and Pictures for Round-ups
There are so many different ways to organize and present a round-up post! If you don’t believe me, check out these three Pinterest group boards I belong to that are full of round-ups: Roundup of Roundups, Blogger’s Best Round-Ups, and ***Best Collections Posts from Top Bloggers***. You’ll notice that some images are collages and others are a single picture, but all share what the round-up post is about (Best Casserole Recipes, Rainbow Sensory Play Activities, or Top 10 Uses for Crest Toothpaste).
If you have a longer list (50 items) it might be a good idea to think about how to best arrange them that would be helpful to a reader (crafts first, then recipes, then costumes if doing a round-up for a themed birthday party). I once did a round-up post called “Spring Cleaning Tips and Tricks for Deep Cleaning Your House” and broke up the cleaning hacks by room, using a <hr> and heading text to divide them up better.
If you have different categories, like crafts, recipes, and costumes, you may think about making a collage image for each section. This will give you more options of pinnable images for the same post. Some people number the images in the collage, with text links underneath. If you do a collage, you could also look at making the images in the collage clickable and linked to the corresponding source using image-maps.com.
However, you don’t need to use images from every single post you use in a round-up post. Some pictures aren’t great from a blog post, or the topic/content you are rounding-up doesn’t really lend well to pictures for whatever reason. Or, the round-up has so many links that including a picture for each one would make your post way too long. I once collected 138 links about teaching kids moral values, and I certainly didn’t include a picture for each link! In that case I just made a single image (not a collage) for the post.
If you are including pictures because it’s a round-up about home decor, crafts, or yummy recipes, and you want people to see these gorgeous pictures, I recommend several things.
First, make the images smaller and uniform in size. Typically my images in-post fill up the space horizontally, but in a round-up of 25 images, that would make for a long post with too much scrolling. Scale them down (or scale them up perhaps in some situations), and make them the same width. It just makes it look better. Also, do not crop out watermarks. A lot of bloggers really do not like that!
Also, when using pictures you MUST link the pictures to the posts you got them from! While this isn’t so much for copyright sake, it is for ease of use for a reader! I hate clicking on an image in a round-up post only to have it take me to the jpg image url only. And be sure to make sure the images and all links open in a new window (html is: target=”_blank”). You want people to stay on your site and click through to more of the posts.
Third, make sure you download and upload images to your blog post instead of copying and pasting them! The main reason is that you are then relying on another site’s server to load the images, and the images are traced differently. So, take the time and do it right and your images won’t disappear randomly, and your page will run faster too.
Another great thing to do is make the links personable! Add some commentary! Make people know what you loved about this link and why you included it in your round-up. It adds value to both you as the collector and to them for having a truly great idea. But, please don’t give away all the details! Those you are linking to also want to get some traffic.
Some bloggers who put together round-ups prefer to organize their round-ups using a site like LinkyTools or InLinkz. It really helps to limit how long a post gets if including lots of links, standardizes the sizes of the links and images (square), automatically makes the links open in a new window, doesn’t bog down your site speed (which using lots of pictures definitely can!), and is less time consuming to make. However, some people don’t like it when bloggers do this because it doesn’t give Google Juice to the person who’s linked in the round-up. And sometimes the code will break randomly and you won’t realize it until someone points it out to you! My friend Katie of Clarks Condensed sometimes uses InLinkz for her round-ups, like in her 30 Ways to Use Leftover Hard Boiled Eggs post if you want to see an example of how it looks.
Great Shareable Image
I will be honest and tell you that I am not sure what is the best image type for a round-up. But, there are generally two ways of going about making images for round-ups: Collage or a Single Image.
If you are doing a collage, I would recommend picking only the very best to include in it and don’t feel like you need to include all of your links in the one collage! Pick the pictures that are crisp, colorful, bright, and already well composed. I would also recommend zooming in on each image so as to eliminate any text, titles, and even watermarks (but only for a collage image). This makes it look cleaner in a collage and less chaotic. You also want to make sure there is a good balance of negative space, colors, lights, darks, etc. Which is why sometimes making a great collage image is much more difficult than you’d originally thought.
To make a collage image, tools like PicMonkey are great. They already have preset grids and designs for you. When making an image for Pinterest though, vertical is best, and square is second best. I like my vertical images 735×1103. But other dimensions work well too, including much longer ones. You also need to think about creating a horizontal image that will look great on platforms like Facebook and Twitter. I prefer to use 1200 x 630 for my Facebook images.
Another tool you can use is Canva, although I don’t like using them to make the collage image. Often I have made the collage image in PicMonkey, saved it to my computer, and then added text or other details in Canva. What I really like about Canva is that it saves your work, offers grids and guides, and have lots of preset text graphics, and it’s still all for free (or $1 depending on the graphics/images you choose). Since it saves your previous work, it essentially has created a template for you to use over and over again for future round-ups, which I love! I have created four different round-ups for my blog using the same basic setup, just changing colors, transparency, or fonts. (My Popcorn Printables, DIY Elsa Costumes, DIY Anna Costumes, and DIY Christmas Stockings.)
You can also use Lightroom to create collages. Jill has several FREE Collage Templates over on her Flourish Photography site. You can then add text in PicMonkey or Canva. If you are a Photoshop user, The CoffeeShop Blog offers hundreds of free collage templates for free.
One of my friends, Clare of Super Mommy Club, does lots of round-ups, and definitely has a set style she uses, with similar text, colors, and collages. She has really branded hers with her unique style. Often it is a good idea to leave a blank space in the collage where you can add the text explaining what the round-up is all about. Jill made up this example to show you:
But, sometimes collages just aren’t the way to go for various reasons, and one great image may do well to represent your round-up and draw readers to click to check it out. If you have a small round-up or a huge round-up, or the pictures just aren’t lending well to a collage format, it’s worth thinking about just using a single image. The image doesn’t have to be from any of the sites you are rounding up, but could be a stock photo (like Jill offers for free or from a host of other great free stock photo websites) or a photo of your own. I have done this with a few of my round-ups (Top Moving and Packing Tips and The Parent’s Guide to Raising Kids with Moral Values).
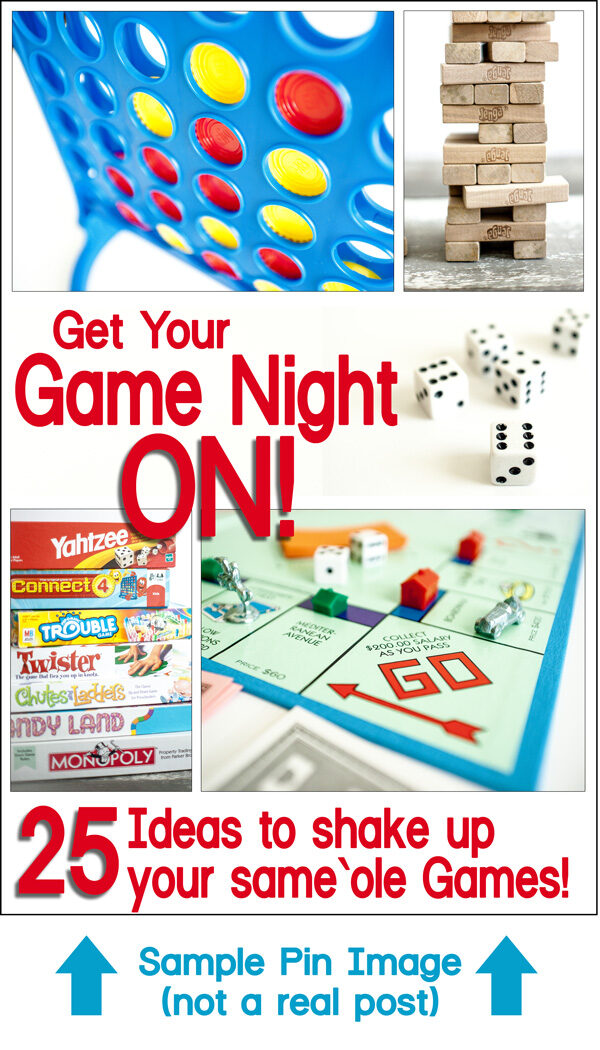
In most of the graphics for round-ups there are generally numbers! Tell people how many tips, tricks, hacks, activities, recipes, or inspiring DIYs they will find when they click through.
Great Headline
I plan on writing a great post about how to make killer headlines soon, but let’s just say, that if you want your round-up to do well and be successful, you don’t want to give it a lack-luster title!, especially after all the time you spent collecting links, organizing it, creating shareable images, and formatting it all just right! While often we use titles that are SEO friendly because we want search traffic, we can do that without being so boring! Add strong verbs (need), immediacy (now!), descriptive adjectives (best, ultimate, yummiest, unique), and make it stand out from other similar posts.
Also, avoid using the word “round-up” in the title. I swear the only people who use the term “round-up” are bloggers. The word “collection” may be okay, but generally, I would just use “ideas” or “inspiration” or “tips” or “ways” or some other word. Just tell people what they will find in your post. And the use of numbers is usually a great idea too.
Sharing Your Round-Up
Obviously, you’ll share your new post like you share all of your posts on your social media networks. However, because your new post is a collaborative post with other people or businesses links, I recommend sharing your link directly with the individuals you featured. Tweet the link and tag the people or businesses you featured. Drop the link on their Facebook page via wall post or message. This notifies them of your post in case the trackback didn’t show up on their end. Some people or pages will likely visit, comment, and even share your post. These are all things you want! So, be sure to let people know you featured them.
Also, I suggest submitting your round-up post to StumbleUpon. StumbleUpon users seem to love lists and round-up posts! You could definitely see some on-going traffic if you do.
The Greatest Benefits of Round-Ups
I don’t do a lot of round-ups and I am not featured in others all that often, but referral traffic from round-ups continues. Everyday I see traffic from round-ups I have been featured in. While sometimes it is only 50 hits in an entire month from one post, others bring me in hundreds, and all together, it equals thousands of new sessions to my blog each month! And some of the round-ups I have created receive regular search traffic and Pinterest traffic, and thereby continue to drive traffic to my blog, earn me money from ad impressions, and gain me followers.
And don’t forget that these round-ups give you good Google juice! More quality sites are linking to your blog, and you are linking to theirs.
I really hope you consider making round-ups for your own site as well as trying to be featured in round-up posts on other websites using all of these great tips!
Do you do round-ups? Have you ever been featured in a good one? Any extra tips to share?
What an awesome post! Thanks for the super detailed information on roundups. I’ve been thinking about starting to do some of these and now after this post, I totally am. Thanks!
So glad it helped Sara! Katelyn really did a good job explaining all the Round-up info we all need!
Wow, Katelyn. You really nailed this one. Great tips. Thanks so much for including my idea and linking to my site. Pinned!
So helpful – answered several questions I had and gave me lots of ideas and resources to use. I really appreciate the time you took to complile all that information.
this is by far one of the best and most detailed posts I’ve read in a while! thank you, thank you, thank you!
There are so helpful tips to drive traffic to your blog. Creating great shareable images are must for blog and social media. I have been using Canva and PicMonkey and both are awesome tools. Thanks for the awesome post Katelyn.
Terrific article! I had to stop to leave a comment because I really appreciate the mountain of info and the info about the fb groupa. Thanks!
Love it! Thanks ffor the link to the roundup database – I didn’t know about that one!
Oh, my word! This is one of the most informative and helpful blogging posts I have come across yet! Thank you so much for sharing this with us. No doubt, it took you a while to put this together. The links you included were so helpful, and I’ve already joined several of the round up groups tonight! I didn’t even know such a thing existed. I’ve always wondered about how to go about doing a round up (errr…collection). 🙂
Thank you, thank you, thank you!
This post was super helpful. Thank you:)
This is super detailed article to open eyes on round up.
Thank you
Thank you for this, particularly for the links to FB groups for round-ups. Do the pictures have to link to each website in a collage? Or do you just need to number them and put the links below? I ask this because image-maps is no longer free and I’m trying to find the easiest ((and cheapest) solution.
You are a goddess. I am going to start implementing these strategies immediately.
Ha. Thank you! Good luck!
Hi Jill! I notice this post is from a while ago, but I’m curious if you still haven’t had an issue with using pics from other sites in your roundups. I’m just trying to do a round up on my blog, but I keep getting conflicting info about this. Let’s face it, it comes down to time. Do I really want to reach out to 20+ bloggers to use their link and picture on my round up? No, and I don’t have the time! Please help!
As long as you are ONLY using a picture, with a link credit, (and preferably an image that doesn’t give the whole things away if it’s a craft) and not stealing their written content, or multiple images, and are encouraging people to click through, it shouldn’t be an issue, in my opinion. If people do not want their picture on your site, they can reach out and ask you to remove it. If they ever do, just take it down, per their request. I may ask for links from a group, but still will pull additional links/images from around the web if I still want a few more ideas on my topic. I don’t ask these individuals if I can.
Most people won’t be bothered by it because it’s free traffic for them and good Google SEO link juice to their site.
Hi – great post and it has helped me loads! – thank you.
I do have one question.
I know that it’s common to add in the code nopin = “nopin” so that no image from other peoples sites can be pinned from my roundup post. This makes total sense, but when I add the code, although it works perfectly – if I have to update the post and re-save it, that nopin code dissappears.
Do you have any ideas? I would be so grateful!
Chrissy x